

REVIEW: Asus Eee PC
 |
Processor: | 900MHz Intel Celeron M underclocked to 630MHz |
| Memory: | 512MB DDR2 SODIMM | |
| Hard Drive: | 4G Silicon Motion Flash Drive |
|
| Graphics: | Intel GMA 900 | |
| Display: | 800×480 TFT LCD | |
| Audio: | Realtek ALC6628 HDA | |
| Networking: | 10/100 Ethernet 802.11b/g Wireless |
|
| Specs as taken from Wikipedia | ||
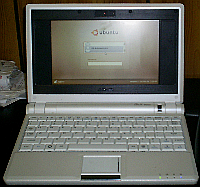
While I enjoy ripping things that don’t work a new one, I feel it’s important to recognize when things work out beautifully. Such is the case with the Asus Eee PC, a small-formfactor laptop. As you can tell from the specs and the size of this thing, mobility and size take precedence over speed and performance. Having said that, the Asus Eee PC is not unbearably slow at all. Given the specs, it’s rather snappy thanks to the way that Linux can be customized.
The Asus Eee PC comes pre-loaded with a customized version of the Xandros Linux OS using IceWM. My only gripe is that the interface is over-simplified and the window decorations are made to look like the Windows XP Silver Theme. This most certainly benefits people who aren’t technically savvy, but there’s no visible way to switch to a desktop like most of us are used to. You can enable a full-fledged KDE desktop by issuing the commands
sudo aptitude update
sudo aptitude install ksmserver kicker
but I never got into testing it because my main intent for buying this laptop was to install Ubuntu on it.
Installing Ubuntu onto this laptop would have been so much easier if I had a USB CD-ROM drive. If you have one, great, use that and grab the appropriate ISO image. As I lack that option, and had a spare thumb drive lying around I decided to use that to install Ubuntu. After mucking around the Ubuntu Community Forums and trying out different things, I decided the best option was to use the option of copying over an ISO image to the thumb drive and using the install CD’s isolinux folder.
- Format the thumb drive to give yourself a fresh start.
- Unmount the thumb drive using
umount /dev/sda1. - Run
syslinux /dev/sda1. If syslinux isn’t installed, runsudo apt-get install syslinuxto get it. - Grab an Ubuntu ISO and save it to the thumb drive
- Be sure to rename any ISO files on the drive you don’t want to use — the installer will use the first ISO it comes across and won’t prompt you for any others.
- Use a program like file-roller or WinRAR to open the ISO image and copy everything from the isolinux directory to the root of the thumb drive.
- Rename
isolinux.cfgtosyslinux.cfg, deleting the oldsyslinux.cfgif necessary. - Remove all references to the install directory by replacing “
/install/” with “” (empty string) in the new syslinux.cfg file.
While that all worked, it was kinda hard to tell at first because of slight confusion in the BIOS menus. I went to make sure that the laptop would boot from the USB stick and not the hard drive.
Boot Device Priority

━━━━━━━━━━━━━━━━━━━━━━━━━━━━━━━━

1st Boot Device                [HDD:SM-SILICONMOTI]

2nd Boot Device                [Removeable Dev.]

3rd Boot Device                [USB:SanDisk U3 Cru]
Moving the USB stick to the first position didn’t work. Removing the drive and returning to the menu shows you why.
Boot Device Priority

━━━━━━━━━━━━━━━━━━━━━━━━━━━━━━━━

1st Boot Device                [HDD:SM-SILICONMOTI]

2nd Boot Device                [Removeable Dev.]

3rd Boot Device                [ATAPI CD-ROM Drive]
The laptop was detecting that the USB Stick might be a possible CD-ROM drive. Since it wasn’t a CD-ROM drive, it would fail and go right to the next device, which I left as the hard disk. Using Removable Dev. didn’t work either. Though it seems to defy logic, the answer is in the Boot Settings Configuration.
Boot Settings Configuration

━━━━━━━━━━━━━━━━━━━━━━━━━━━━━━━━

1st Drive                      [HDD:SM-SILICONMOTI]

2nd Drive                      [USB:SanDisk U3 Cru]
The USB drive is being detected as another hard drive. Move it to the first position and the laptop will boot from the drive.
I installed Ubuntu as planned after getting past that, making sure to forgo a swap partition and to use an ext2 partition with the noatime option. (As flash drives have finite writes, these two options will save on writes to the drive.) It took an agonizingly slow 2 hours to install, though I don’t really know why. Was it the ISO-on-a-stick method, the limited RAM, or is flash really that slow when it comes to write speed? I favor the latter, because installing security updates took just as long. So it took me a total of 4 hours to install Ubuntu, and I hadn’t even started customizing anything yet.
Fortunately, benoit.favre at Google Code has taken care of the customization part with a simple script The script will automatically handle boot customization, drivers for video and wifi, enabling the hotkeys and over-clocking, and customization to Gnome to make it small-screen-friendly. In my experience, the superficial things like font sizes the volume hotkeys didn’t work, but the stuff most people are afraid to touch (drivers & boot settings) did.
Using Ubuntu
While I was able to use the 3D desktop, and performace was still snappy, it made videos crash and the image viewer got funky with full-screen. Don’t know if this was a driver bug or a bug with the 3D compositing in Gnome, but I disabled 3D desktops nonetheless. The keyboard is a bit cramped, so if you touch-type just be forewarned that your hands will cramp something fierce if you try to use the Eee PC’s keyboard like a regular keyboard. Even with smaller fonts, some Gnome dialog boxes are taller than what will fit on the screen.
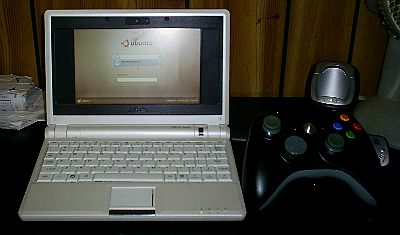
Overall, this is a great little laptop. Its size makes it a great companion while playing games or working on another PC.

jim gunn 2:55 pm on June 4, 2008 Permalink |
how’s that working for you?
i was thinking of installing unbuntu lite
and wine
thanks
jim
brainwreckedtech 5:17 pm on June 4, 2008 Permalink |
I’m actually running Xubutu 8.04 on it now, as Xubuntu uses Xfce, and this desktop environment comes with the ability to run the main menu from a right-click on the desktop, thus negating the need for any horizontal panel, thus freeing up vertical space on the tiny resolution of EeePC. I use a vertical panel that auto-hides for statistical stuff (like CPU speed, memory and network usage), a list of programs running, and the system tray.
I still love it. Start-up time is still a pain, but it’s so small and unobtrusive that it can go anywhere.
Eee Hacks 2:14 pm on July 25, 2008 Permalink |
Gnome is slow… even on my Core 2 Duo 2.4GHz
I think Xubuntu is the only one from Ubuntu family that can work on Eee painlessly.